


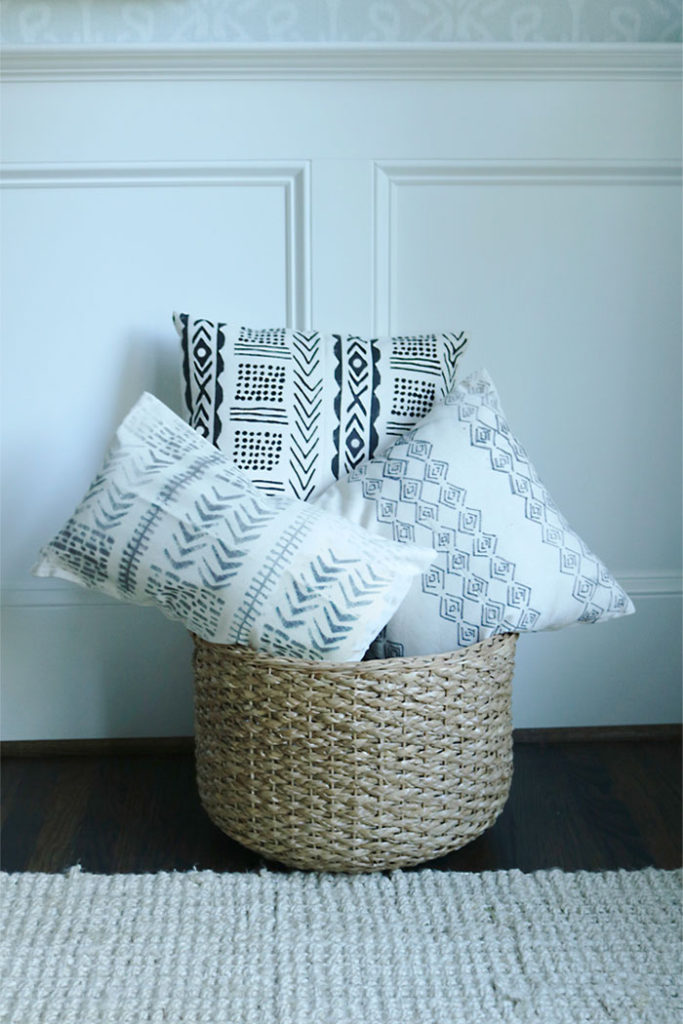
DIY Mud Cloth Pillow Tutorial Using Freezer Paper
I’ve been wanting to do a DIY mud cloth pillow tutorial for awhile and have seen some really great basic tutorials online. But I wanted to do a DIY with freezer paper creating the look of a mud cloth pillow that had more complicated patterns. I played around with some different techniques last week, and I came up with three different freezer paper techniques that you can easily and quickly do to achieve the look of an African mud cloth pillow. I also included 4 different patterns that you can download and apply to your pillows. Or you can always get mud cloth pattern ideas with a simply search on the internet.
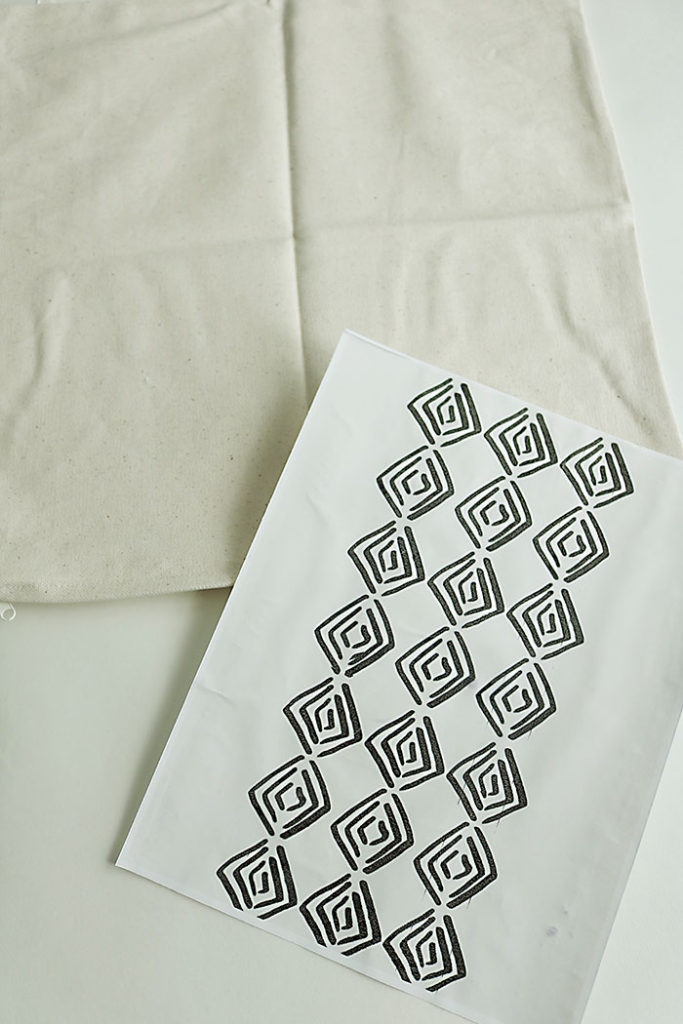
One of the first things you need is a blank pillow cover. I picked up a few canvas pillows at Hobby Lobby, but Ikea has white cotton pillow covers in a variety of sizes and also Amazon. Or if you have the time and want to keep your costs down, you can pick up a painter’s drop cloth and sew pillow covers in whatever size you’d like.
I am going to show you three DIY mud cloth pillow techniques using freezer paper. Below the tutorials I include 4 different patterns you can download
- DIY MUD CLOTH PILLOW–FREEZER PAPER AND PAINT
Supplies
Freezer Paper
Sponge
Cricut Machine OR exacto knife
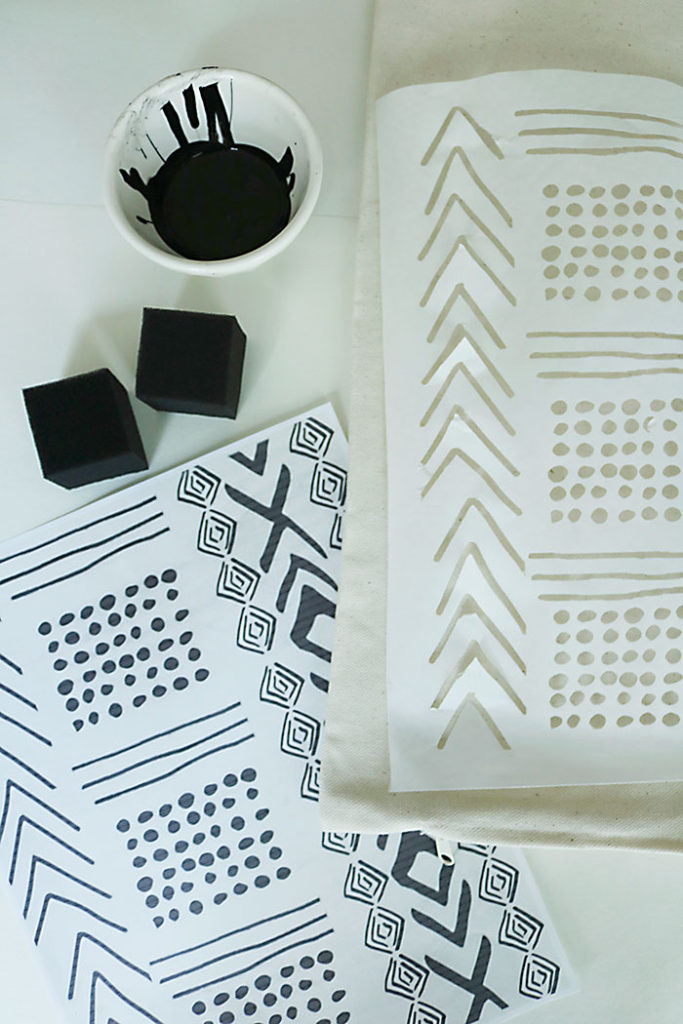
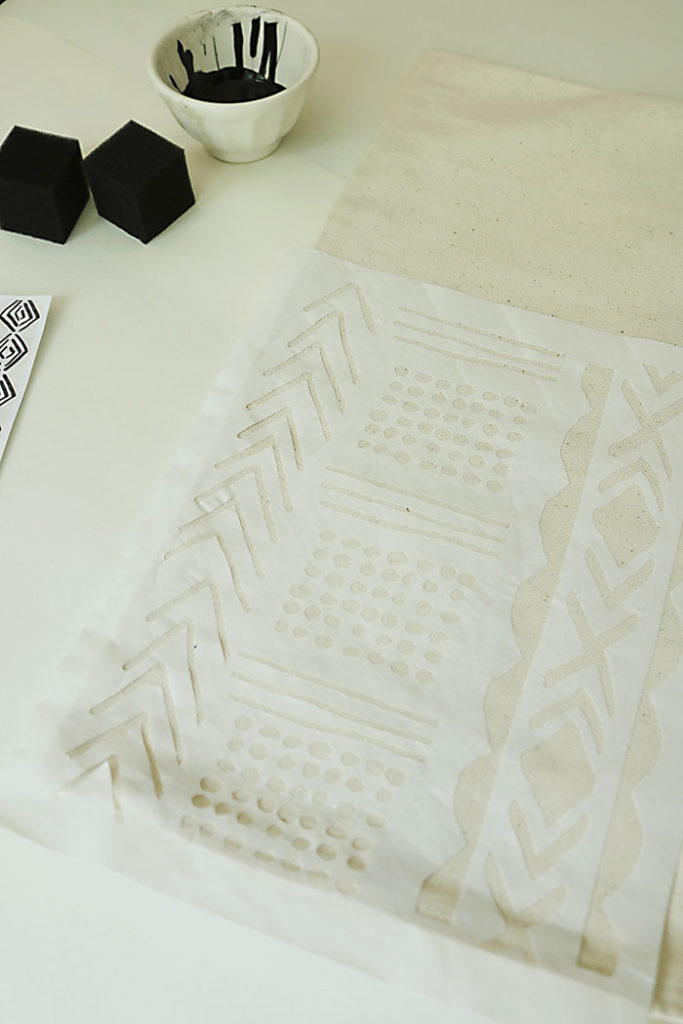
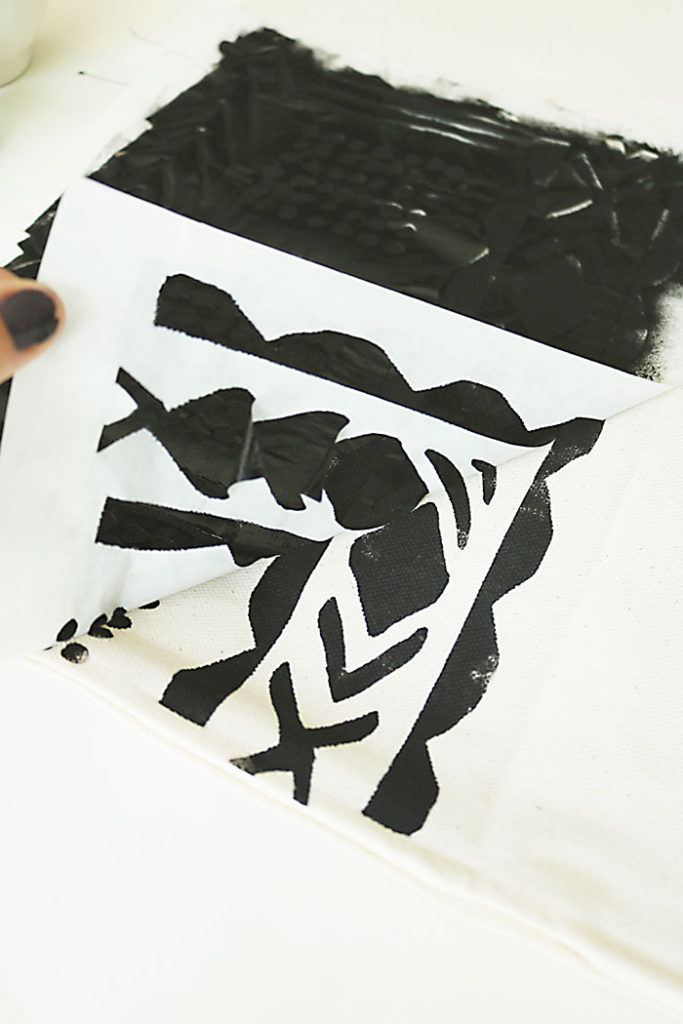
This technique is your typical freezer paper stencil similar to making a t-shirt. Using fabric paint, this will give you the best results with mud cloth patterns. All I did was upload one of the patterns in my Cricut explore program (which I love and try to use it whenever possible) and then cut the image on the freezer paper (shiny side down). Once cut, iron the freezer paper on your pillow. Using a sponge, paint over and then gently pull off the freezer paper.
If you don’t have a Cricut, then print out one of the patterns below (or find one online). Using the graphite paper technique (tutorial here), transfer the image onto the freezer paper. Then use an exacto knife to cut the image. Make sure you cut the freezer paper the size of the pillow case. Then transfer and cut image. Iron freezer paper, then paint
2. DIY MUD CLOTH PILLOW– Freezer Paper and Sharpie Pen
Supplies
Freezer Paper
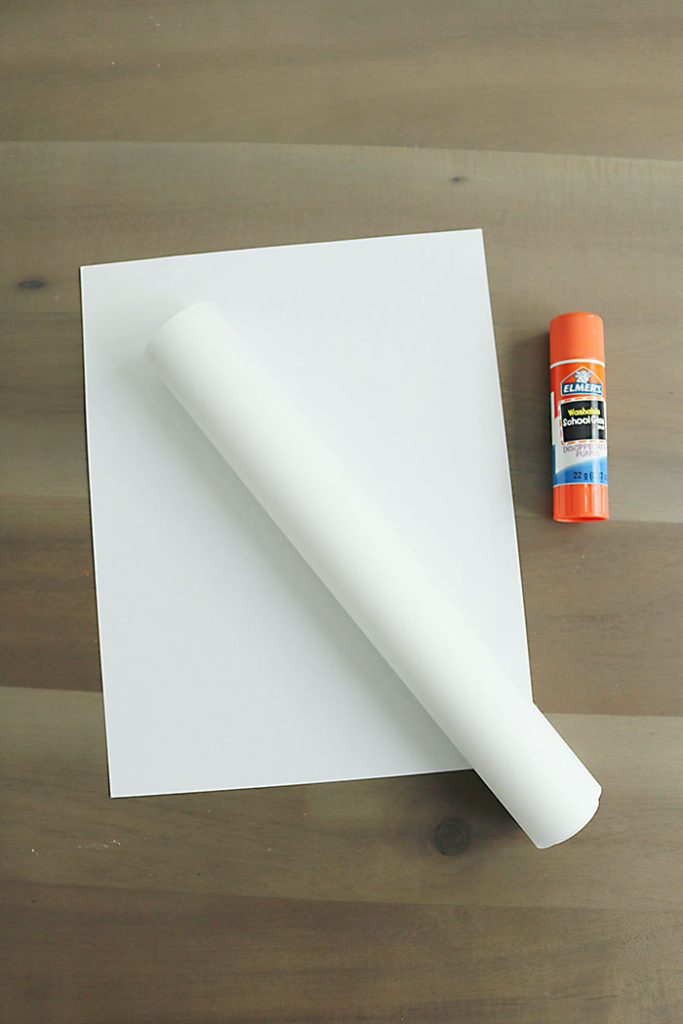
Letter-size Paper
Glue
Sharpie
Printer
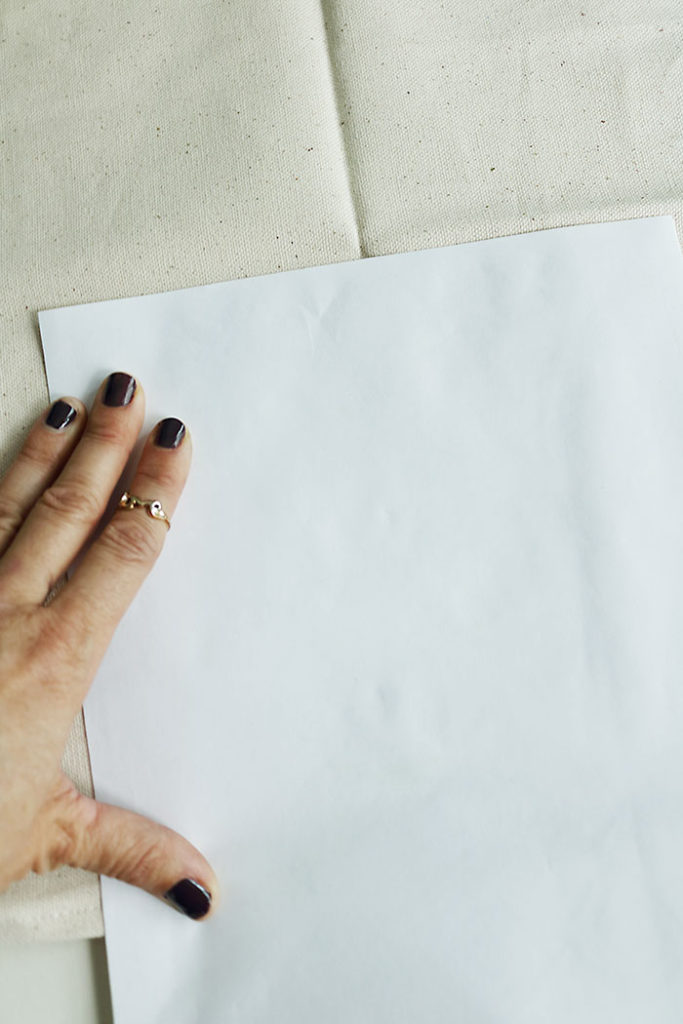
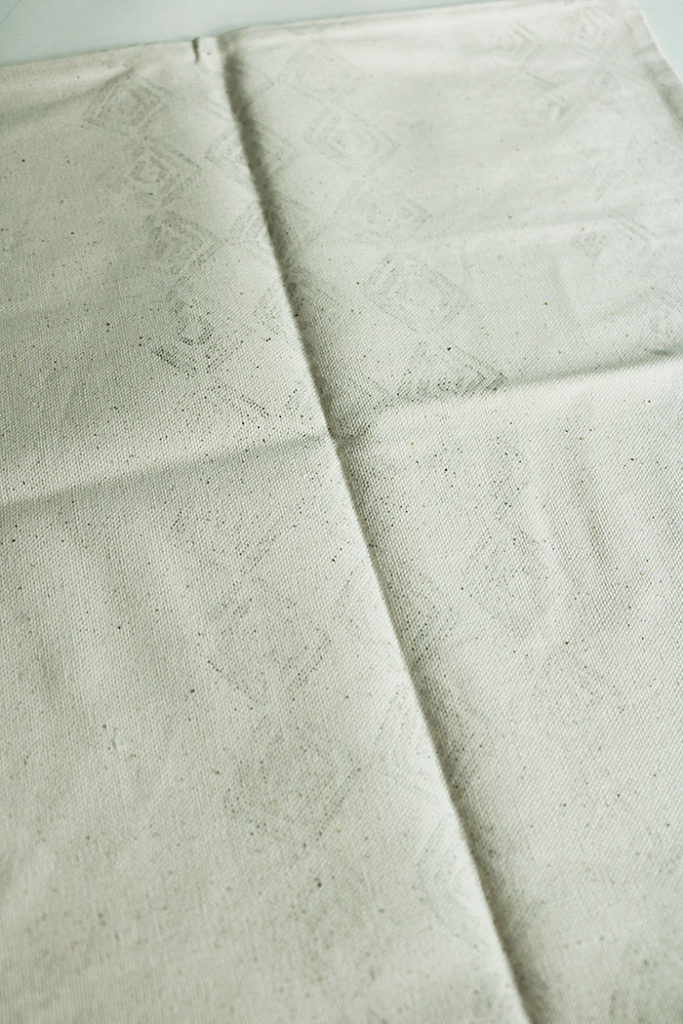
The second DIY mud cloth technique is fast, and if you love the sharpie look, this is your technique! First thing, take a letter-size printer paper and glue the matted-side of the freezer paper down onto the printer paper. The shiny side of the freezer paper will be face up. Make sure to cut down the freezer paper so it is the size of the letter-size paper. You have now create a reusable transfer paper. Now put the freezer paper in your printer making sure the image will print on the shiny side. After it is printed, position the image on the pillow cover and firmly press the image (shiny side of freezer paper) onto the pillow cover. The ink from the printer will lightly transfer onto the pillow cover. You can wipe the image off the transfer paper and re print. Repeat until the pattern covers your desired area of the pillow. You will see the pattern lightly on the pillow. Take a sharpie and trace the pattern to make it darker.
3. DIY MUD CLOTH PILLOW–FREEZER PAPER AND PRINTER INK
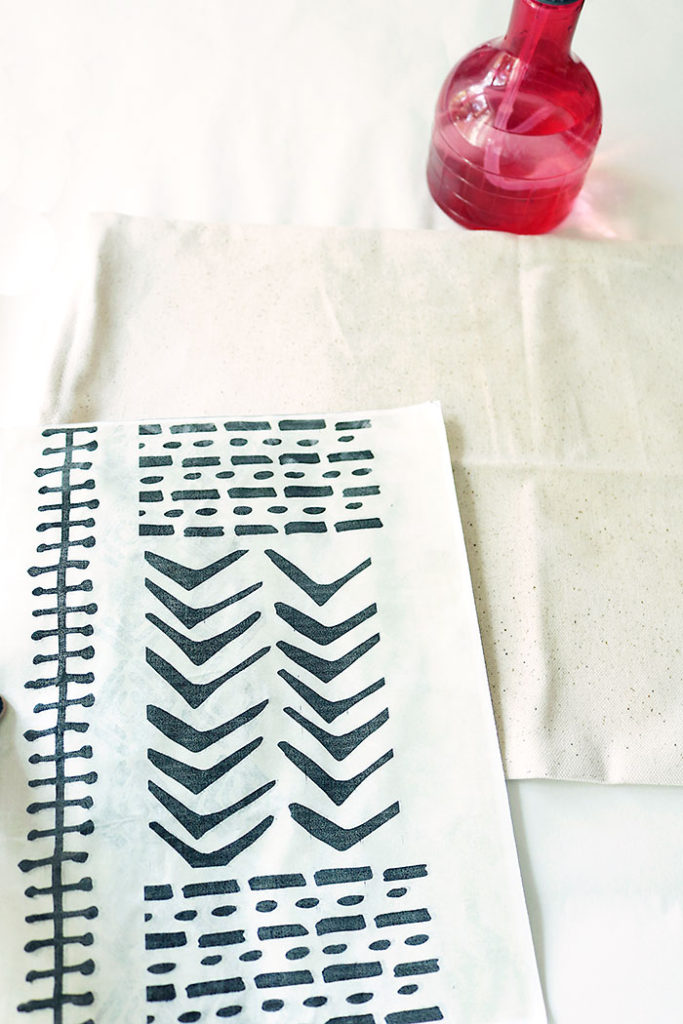
Supplies
Freezer Paper
Letter-size Paper
Glue
Printer with Black Ink
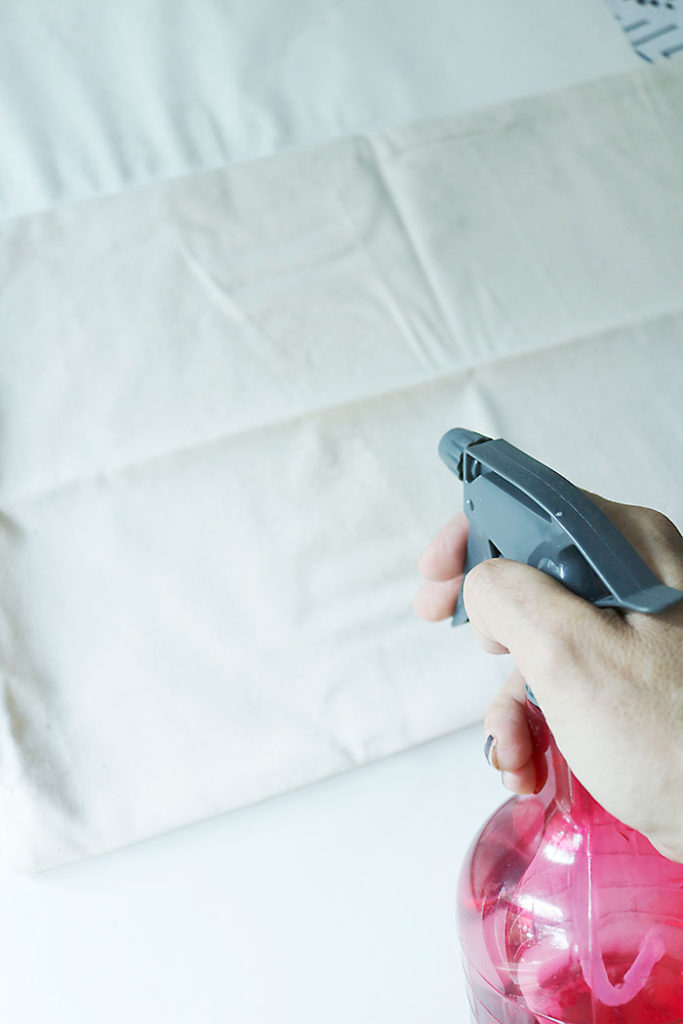
Spray bottle with water
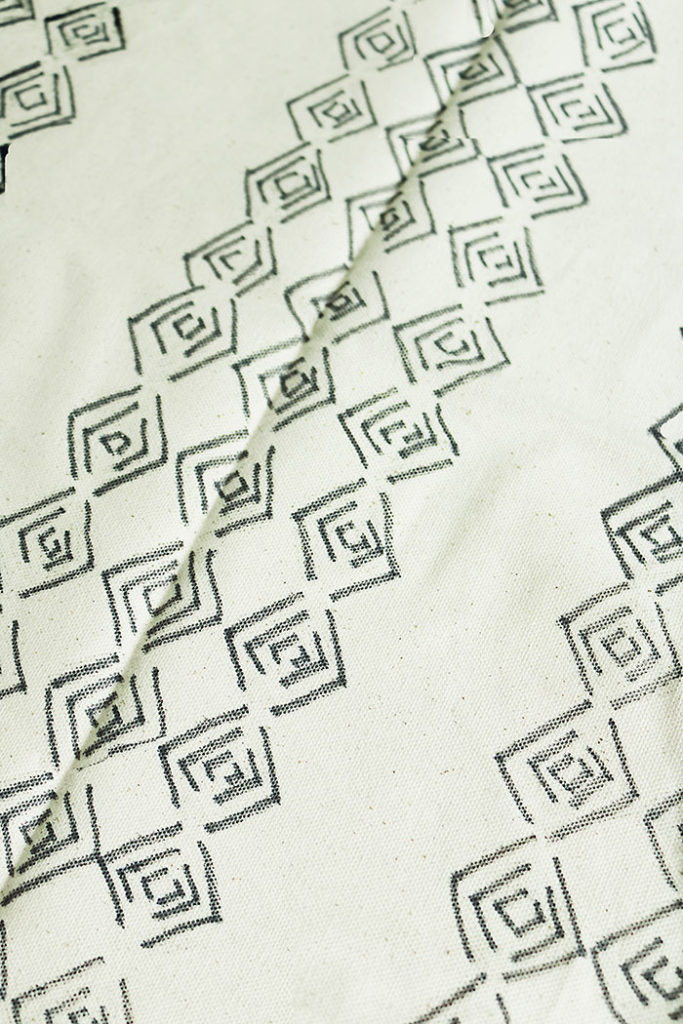
The third and final technique is the fastest and creates an Ikat African pattern style. The ink isn’t perfect but I love how organic and natural it looks. Similar to the previous technique, you will create a transfer paper using the freezer paper and print the image onto the shiny side of the freezer paper. Then lightly spray with water your pillow cover. Don’t soak it, just damp it. Wipe up any puddles. Then flip over the transfer paper with the printed image onto the blank pillow cover. Firmly press. The ink from the printer will show up more than having a dry pillow cover. You can wipe the image off the transfer paper and reprint. Repeat until the pattern covers your desired area of the pillow. Then let it dark 24 hours. After it is fully dry, take a fabric paint sealer spray and spray to seal the ink onto the pillow cover.
Hope you have fun creating your DIY mud cloth pillow! If you’d like to download some patterns to use on your pillow, links are below.
FREE DOWNLOAD MUD CLOTH PATTERN
FREE DOWNLOAD MUD CLOTH PATTERN2
FREE DOWNLOAD MUD CLOTH PATTERN3
FREE DOWNLOAD MUD CLOTH PATTERN4
Let me know if you have any questions!
Shop this Post:


The post DIY Mud Cloth Pillow Using Freezer Paper appeared first on Darling Darleen | A Lifestyle Design Blog.
