
DIY Round Leather Bag Tutorial
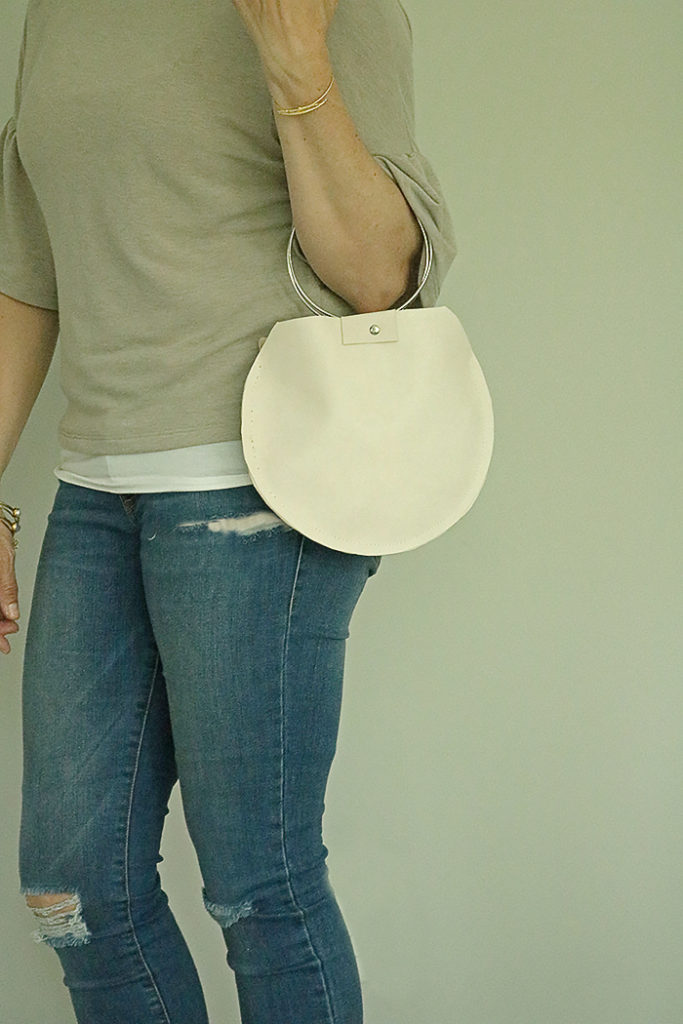
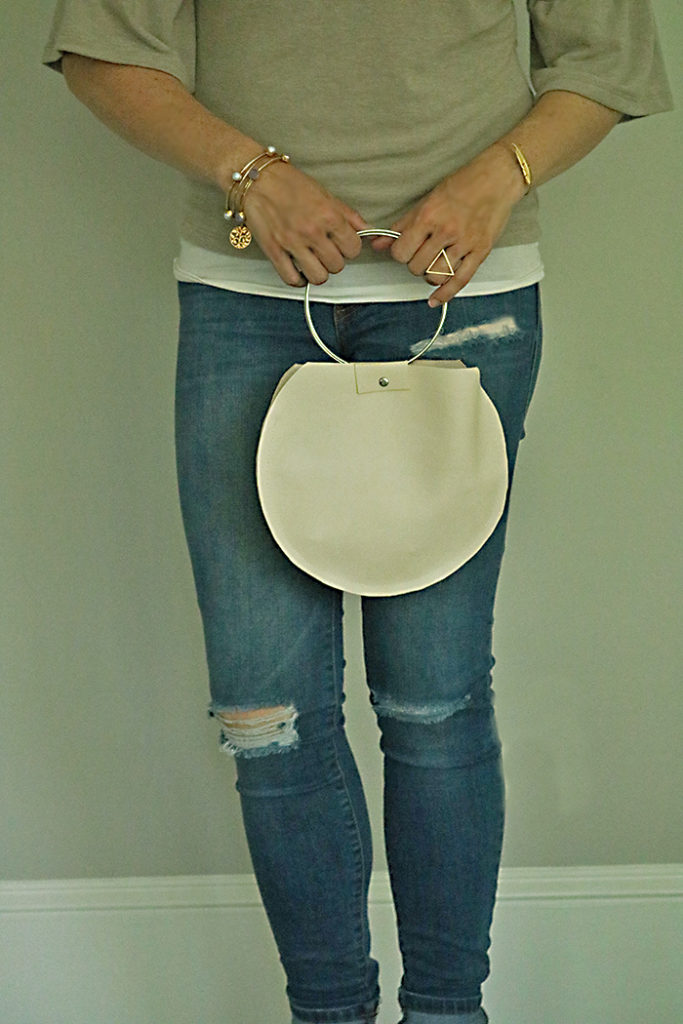
A recent obsession and current trend is the round leather bag clutch. It’s a modern take on the classic bag styles you would see in the 1960s. Retro vibe but it still has a simple look, the round leather bag is a fun accessory to incorporate in your summer style. Another trend is the metal round handle. I’ve been seeing many European bag with that style and it will definitely be making it’s way to the States. With all these new trends, I thought it would be a good idea to do a round leather bag tutorial that is easy and simple for a novice, which I am in the leather-making category. This round leather bag tutorial is also a quick tutorial and took me about 30 minutes to make. So if you are in the need of a new going-out bag that is budget friendly, this is the one for you!
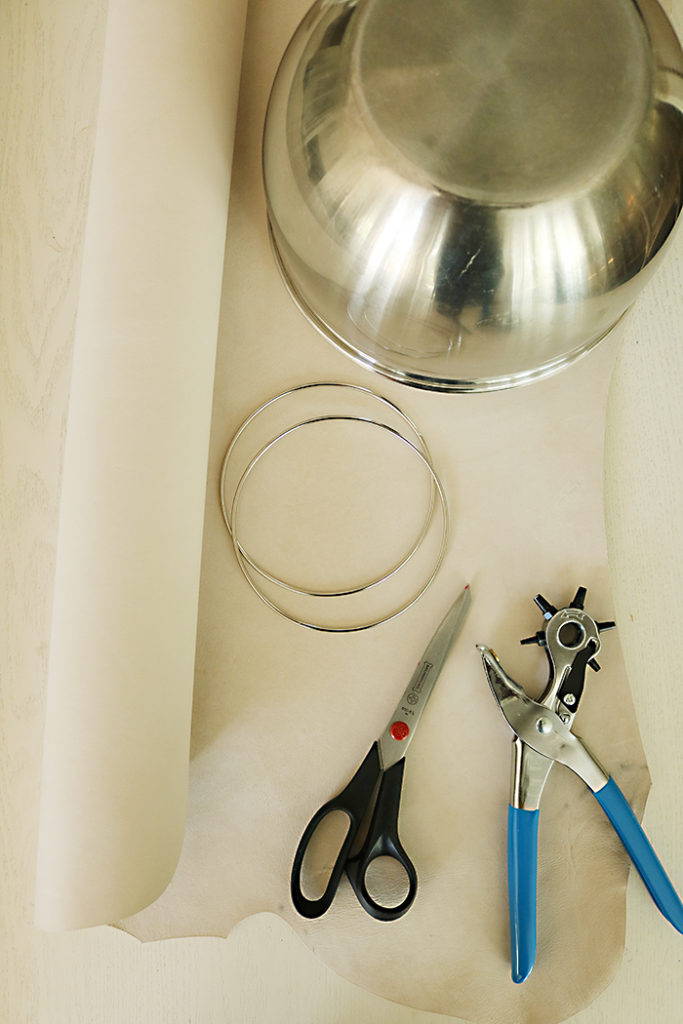
Supplies for Round Leather Bag Tutorial
a plate or something that is round
pencil
Ruler
Scissors
Sewing Machine

Instructions for Round Leather Bag Tutorial
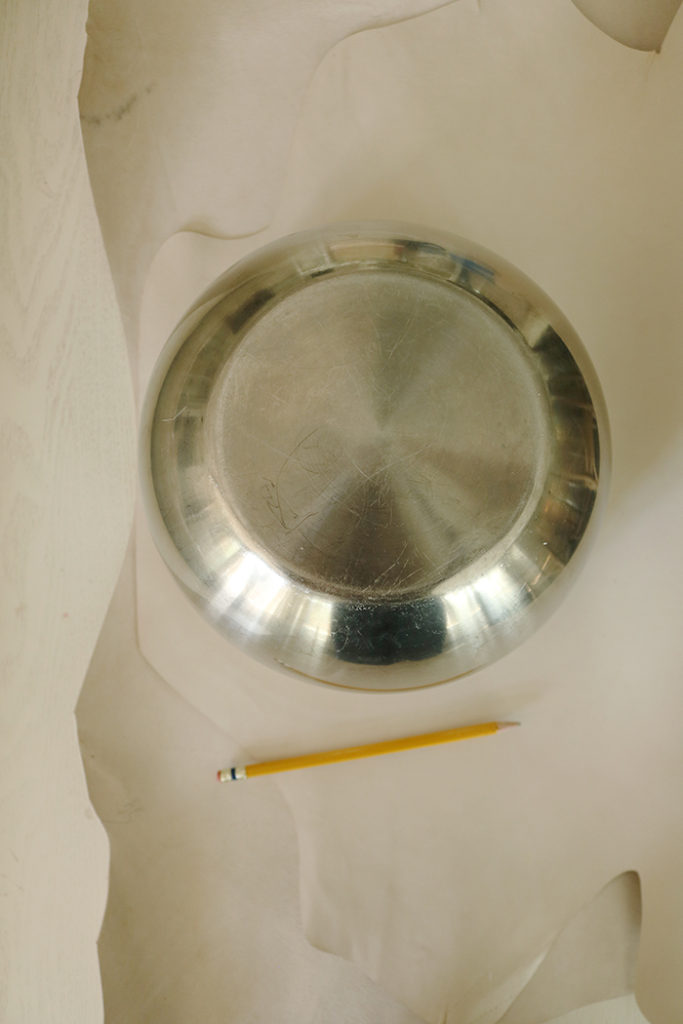
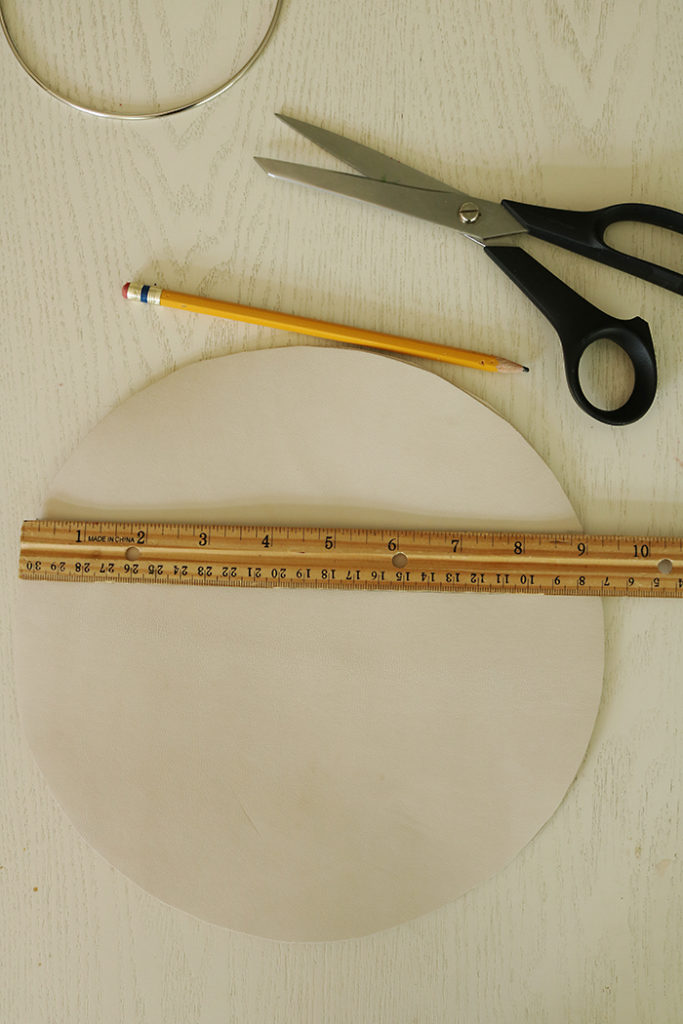
- Roll out your leather and fold in half, putting the wrong-sides together. Place a large plate face-side down on the leather. Use it as a template to draw a circle. Then cut out the circle. You should have two circles.
- Place a ruler on the upper side of the circle about two inches down from the top. With a pencil, lightly mark a line on each side and mark the middle of the ruler. The move the ruler up a little, centering the ruler on the mark lines, then do mark another line all the way across on the bag.
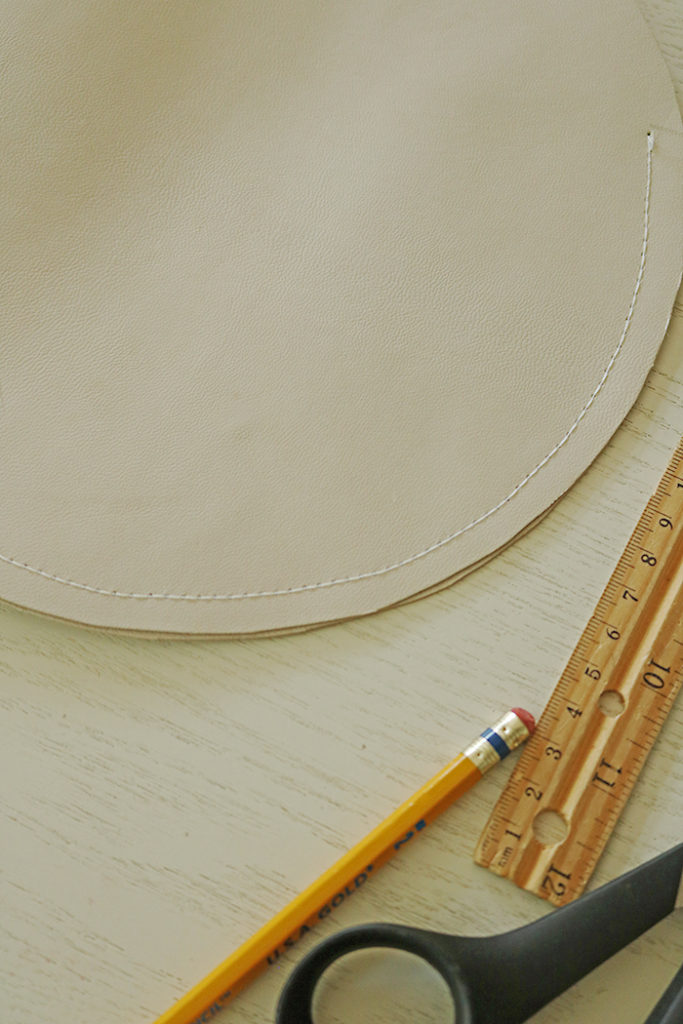
- Pull out your sewing machine and set it up to be able to sew on leather. Make sure you have upholestrey thread. Sew the two circles together starting and ending at the short lines marked from the ruler.
- Cut out two squares in the leather that are about 2.5 inches in width and height
- Take your leather hole puncher and punch where you marked the center of the bag. Then using your scissors, cut where you marked the line all the way across. That will remove the excess leather, and the round circle will now be flat on top.
- Take each square and fold. Using the ruler, mark the center just a few centimeters from the edge of the square. Then punch out with the leather puncher.
- Grab your rivets. Place the metal ring behind the round sewn leather and take the small square and feed the rivet through and secure with the other side of the square’s hole. Hammer in place so the rivet can’t be separated.
- Repeat on the other side, and then enjoy your new bag!


To go along with the round leather bag tutorial, here are some other round leather bag options:


The post Round Leather Bag Tutorial appeared first on Darling Darleen | A Lifestyle Design Blog.
