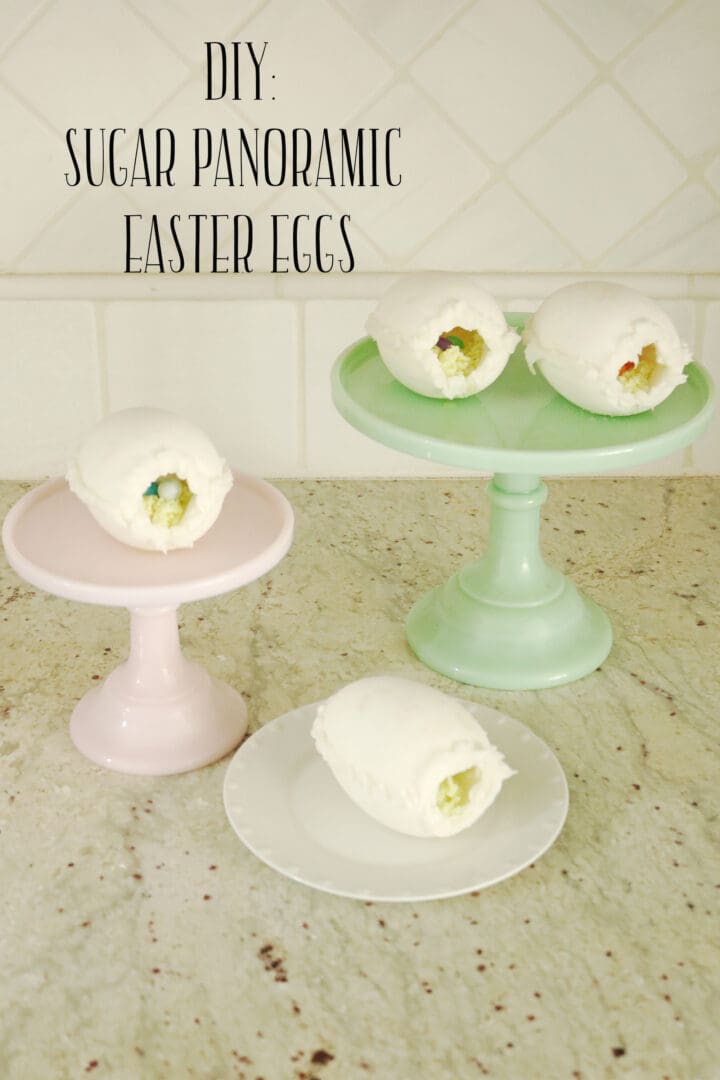
DIY Sugar Panoramic Easter Eggs
One of my fondest memories of Easter is receiving a beautifully decorated sugar panoramic Easter egg in my Easter basket. The sweet joys of picking it up and peeking through the hole to see a tiny sweet Easter scene. I remember a lady at my church who was an expert at crafting these ornate sugar panoramic Easter eggs, and who taught my mom how to make them. During the month of Easter, my mom would have the house decorated with these sugar Easter eggs, each with a different unique scene because they really can last from year to year, especially if you store them properly. Making sugar panoramic Easter eggs each year, it seems, has become a lost tradition. At least in my house. Crafting one of these sugar eggs is similar to making a gingerbread house during Christmas. Well, I have decide to bring this tradition back and make it a yearly Easter family activity. It really is quite simple to make, and my kids loved it!
For the purpose of this DIY post, I kept the sugar eggs simple and minimal. Also, baking and decorating anything edible is not my forte! Simply said. But when we made these as a family, I had many different Easter candies and different icing colors and edible flowers, etc. So the ones the kids made were bright and colorful.
When I started making these, I followed a few different recipes I found online and many of these were a little time-consuming. Through trial and error and making changing to recipes, I have found this to be the best DIY sugar panoramic Easter egg recipe that is for that mom who doesn’t have a lot of time and tends to bake the day she needs them! If perhaps this sugar panoramic egg DIY isn’t for you, but you still want to do something crafty over Easter, then perhaps you could get started on some Easter embroidery designs that you can purchase online! Either way, whichever you choose should get you into the Easter spirit.
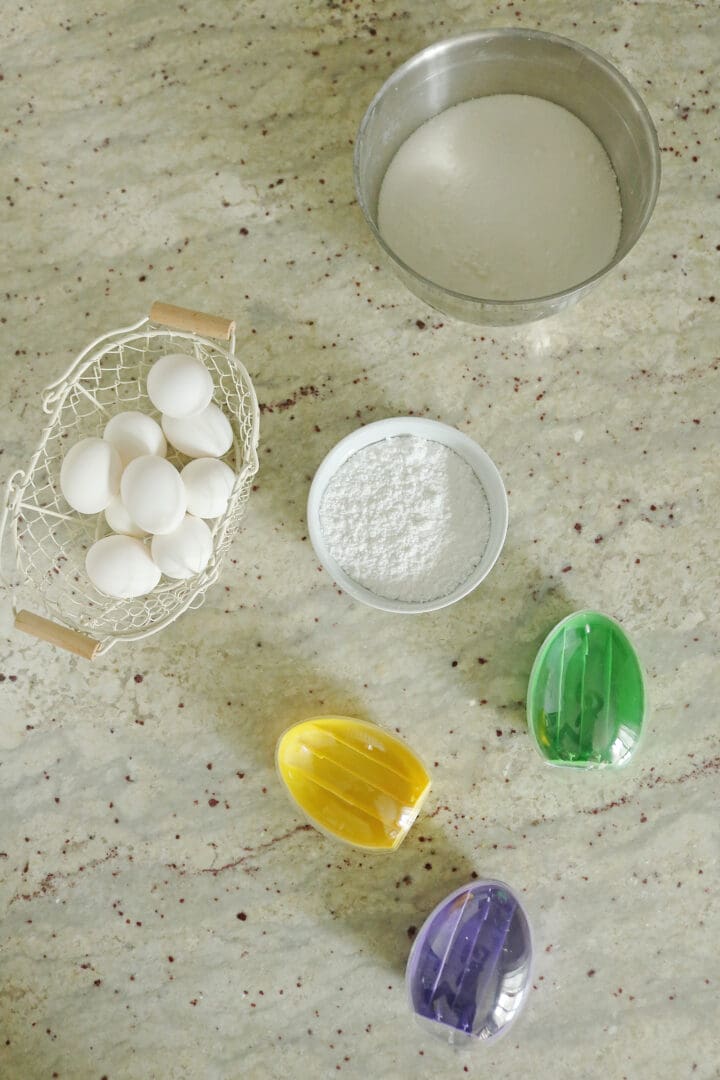
DIY Sugar Panoramic Easter Eggs Supplies
3 1/2 cups of white granulated sugar
1/2 cup of confectioner sugar
1 egg white
Food coloring (optional)
Egg mold (or keep the Easter egg packaging from Reese’s pieces candy or PEZ dispenser candy–similar to the ones above)
Knife
Royal Icing
Easter candy
How to Make the Sugar Easter Egg Molds:
- Preheat oven to 200 degrees and prep a cookie sheet with parchment paper
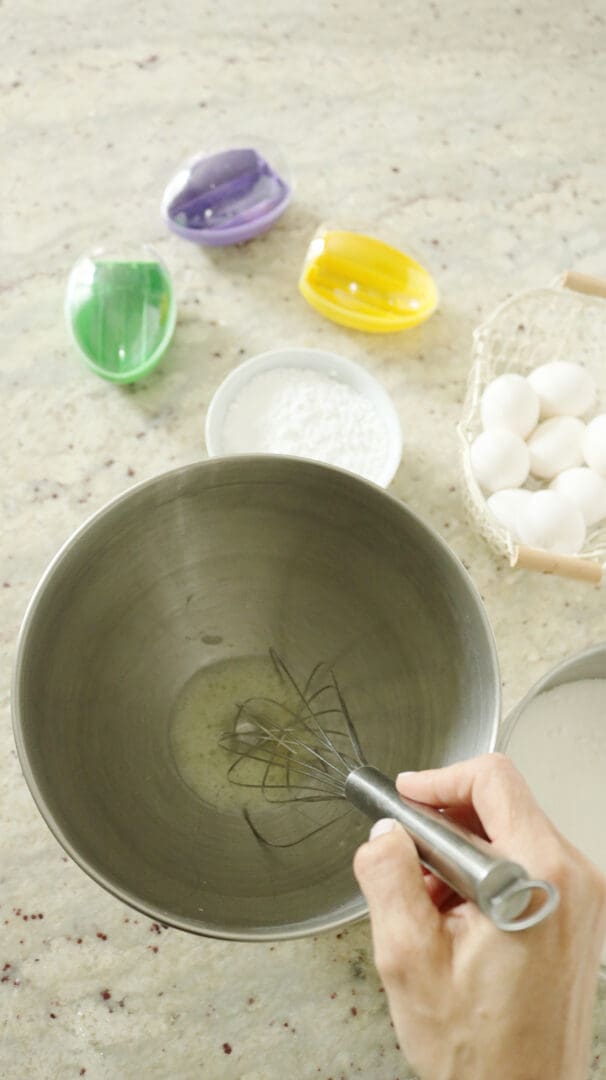
- Whisk the egg white until it starts to be frothy. If you would like to color your egg, add food coloring to the egg white and mix well. Make sure to dye the egg white darker than your desired color because you will be adding a lot of sugar to the egg white.
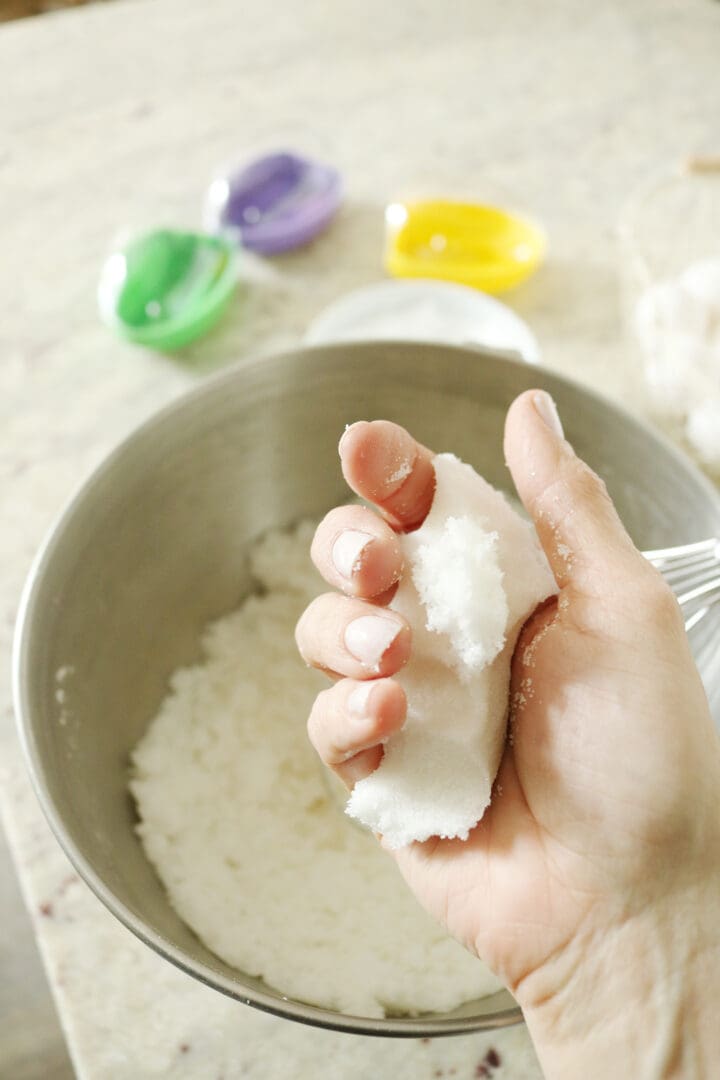
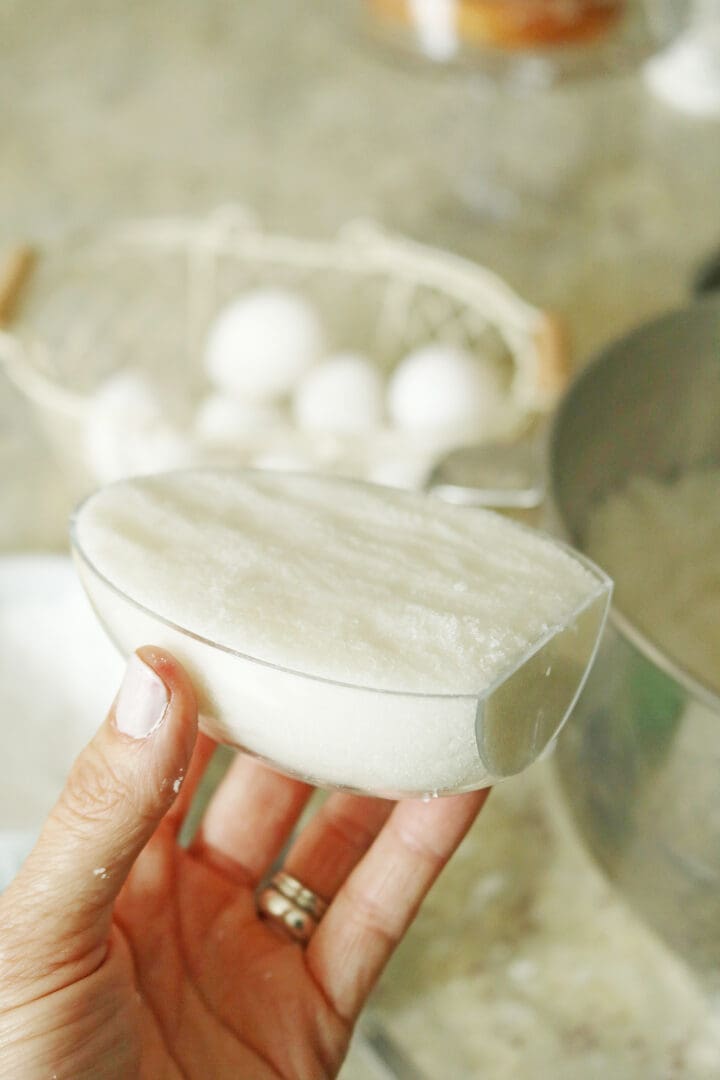
- In a large bowl, whisk together the granulated and confectioners’ sugars. Then pour the egg white into the sugars and stir until the consistency is damp sugar similar to moon sand. It will seem like there’s not enough liquid, but you want the sugar to be able to clump together when you squeeze it in your hand. Avoid adding additional egg whites or liquid or it will make the mixture too wet resulting in the sugar eggs not molding properly.
- Once your sugar mixture is ready, start filling your egg mold. Scoop the sugar into the mold and packing it down firmly. You want the sugar to be smooth and packed, so press down on the sugar to prevent any small gaps or cracks from forming in the mold.
- Use a knife to carefully scrape across the top of the mold, removing any excess sugar. Your eggs should have a smooth, even top that is the same level as the mold when you are finished. Do the same for your egg base, if you are using one.
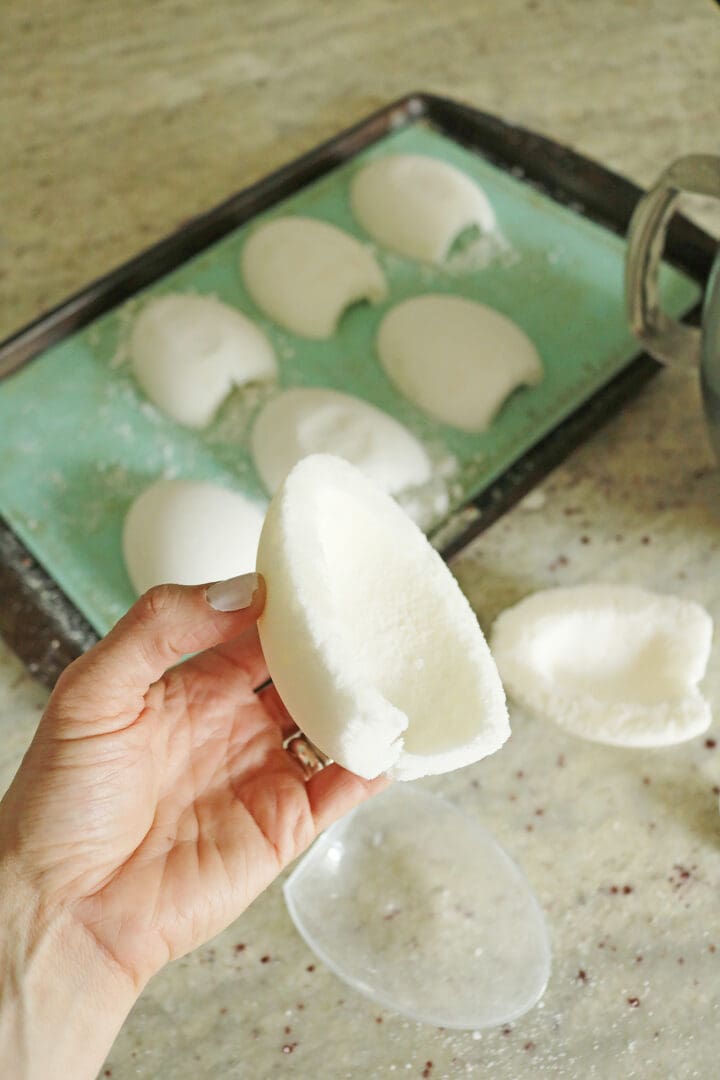
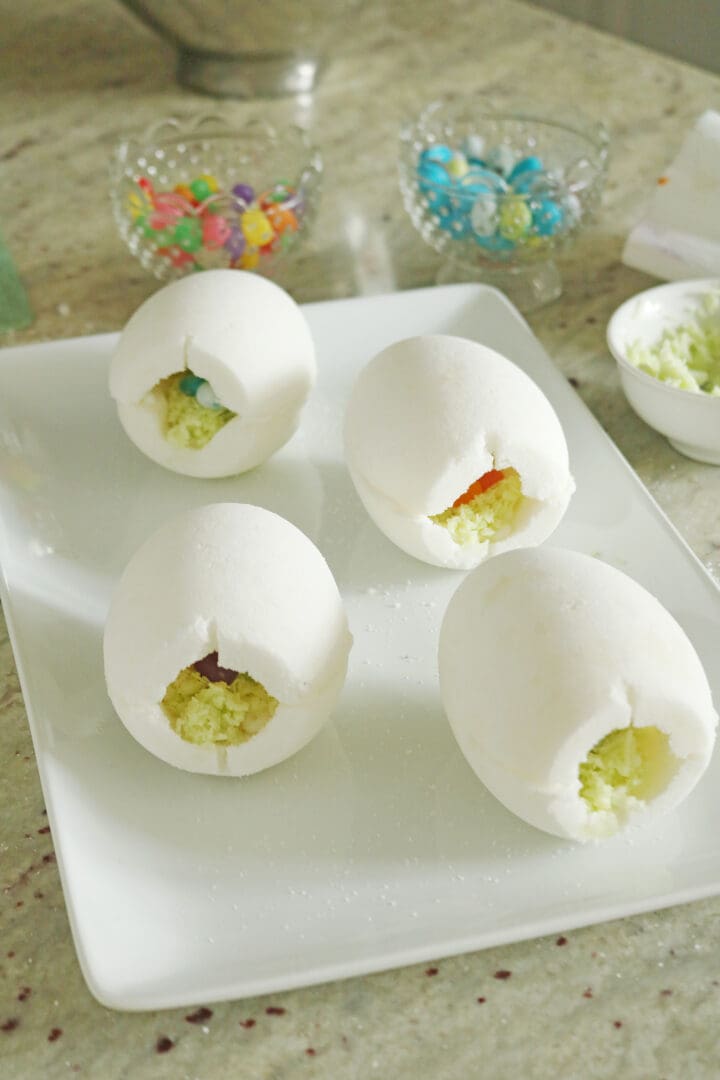
- Now before you transport the sugar egg from the mold to the cookie sheet, it needs to be hollowed out. If you have firmly packed the sugar in your egg mold and have a good damp consistency, the outside of the egg should hold up while the inside is hollowed. Pick up the egg mold and hold it in the palm of one hand and use a spoon to scrape out the moist sugar in the inside . If you are saving your sugar to make another egg, you can add this sugar to the bowl and re-use it later. Continue to scrape the interior of the egg until you have a sugar shell that is about 1/2-inch thick. You want it to be as thin as possible, while still being sturdy enough to hold together.
- To transfer the hollowed sugar egg to the cookie sheet, hover the mold close to the cookie sheet and quickly flip it over. Slowly pull the mold up and the hollowed sugar egg should be in one piece. Repeat for the other egg half. If you have an egg mold that doesn’t have a bottom that is flat, take a sharp knife and gently cut off some of the sugar so one half of the egg mold can be the bottom stand. If you forget this step, it can be sanded down after it cooks. Repeat until you fill your cookie sheet up with sugar Easter eggs
- Place the cookie sheet in the heated oven at 200 degrees for 30 minutes. After it is done, let it cool.
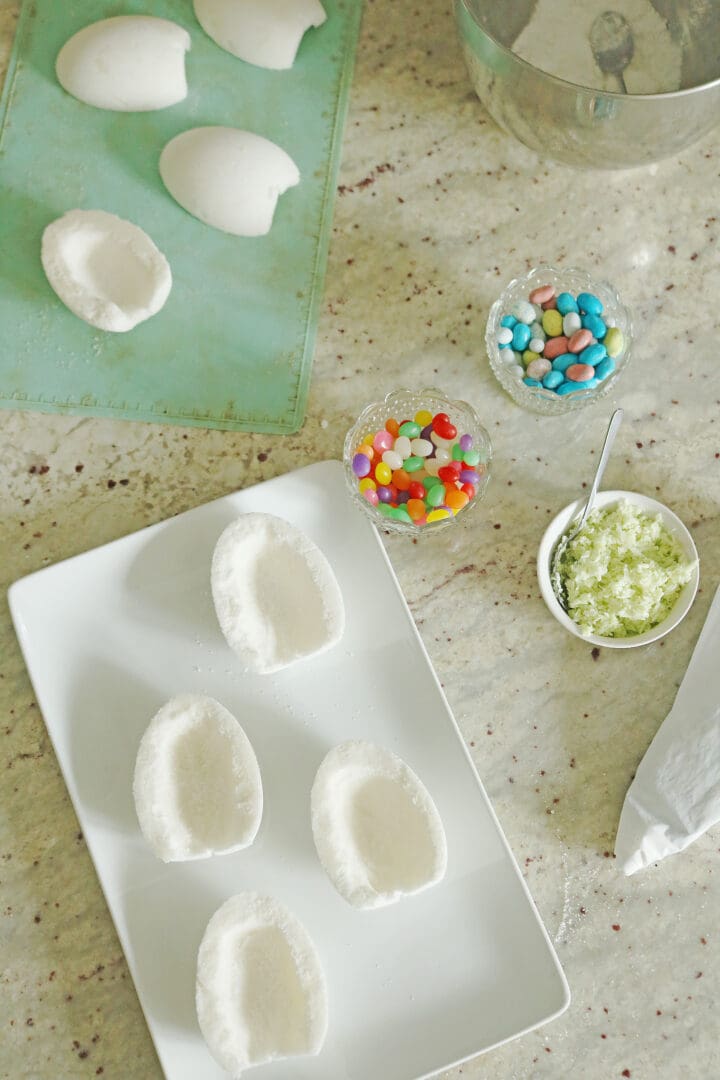
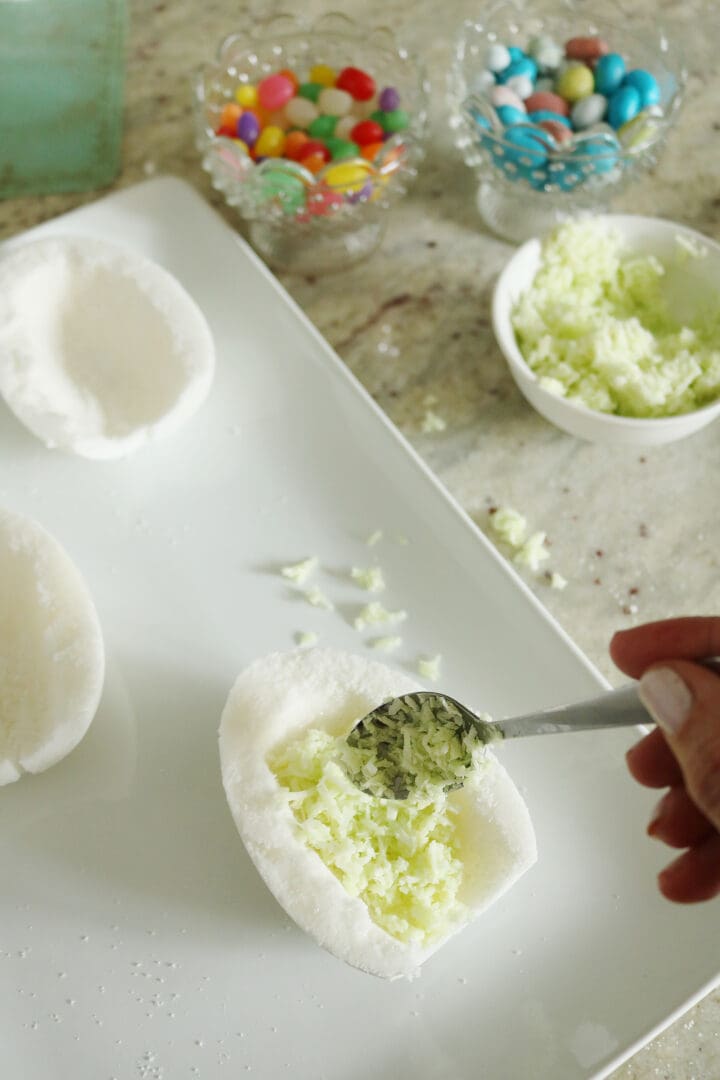
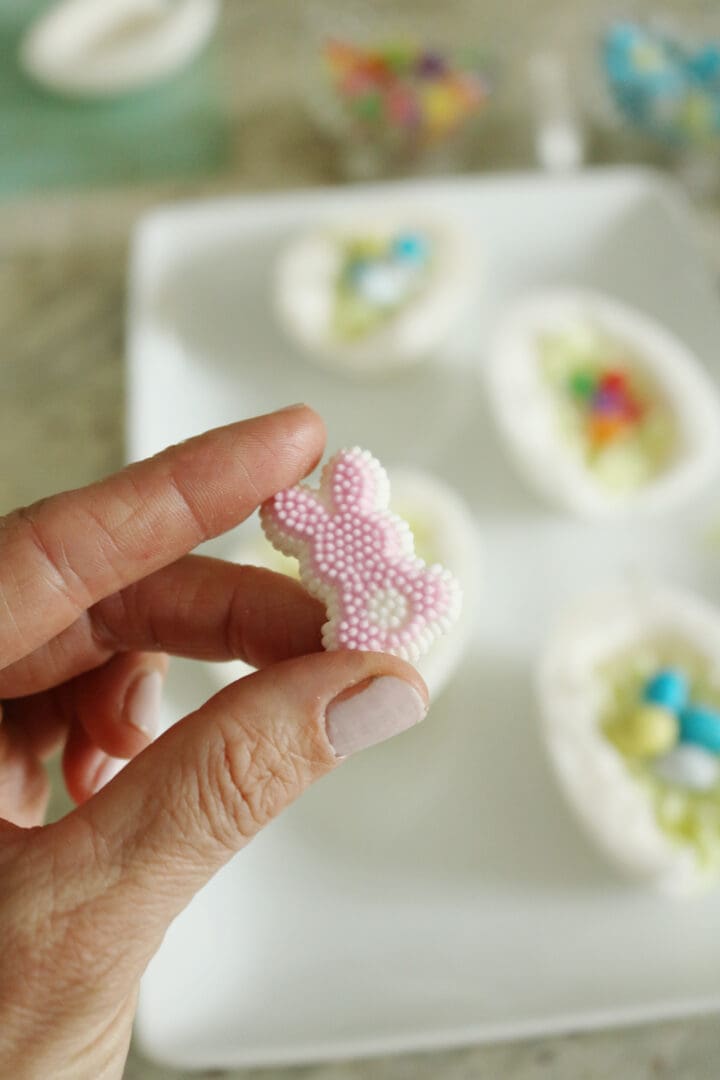
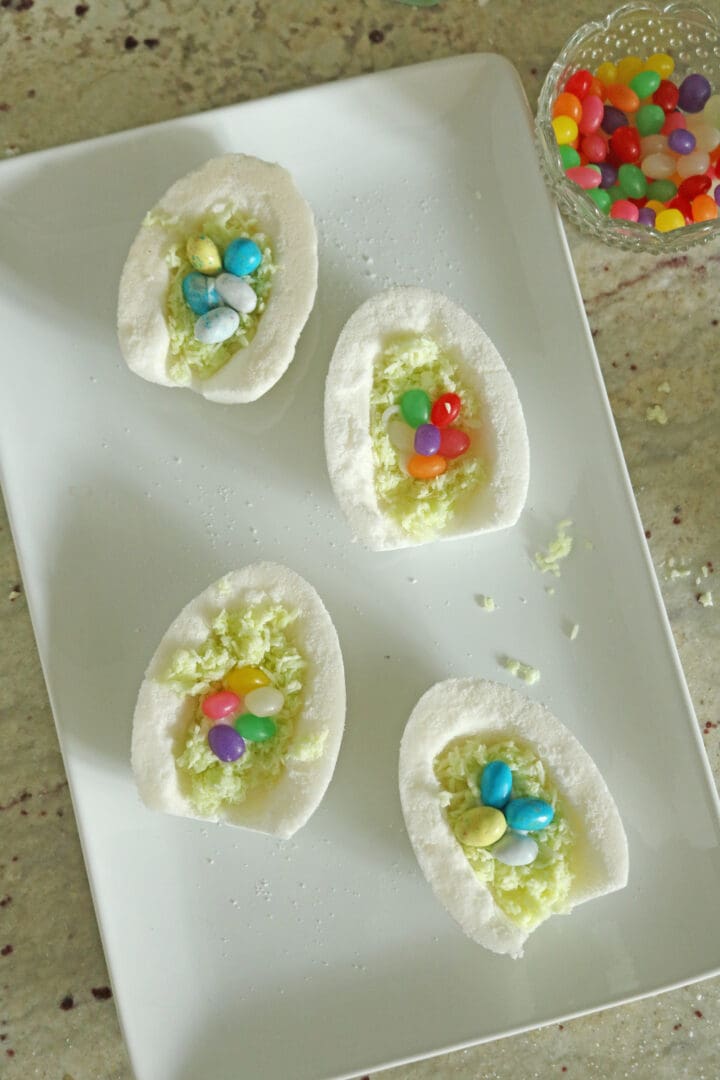
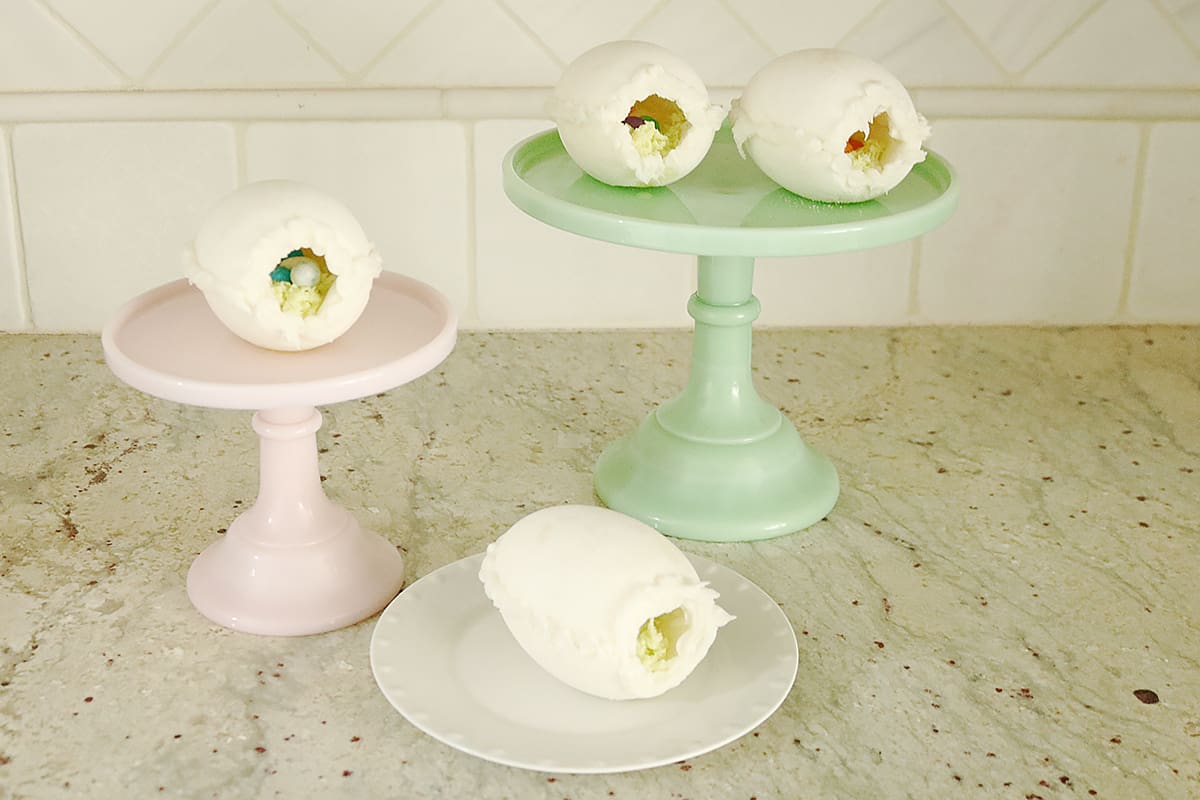
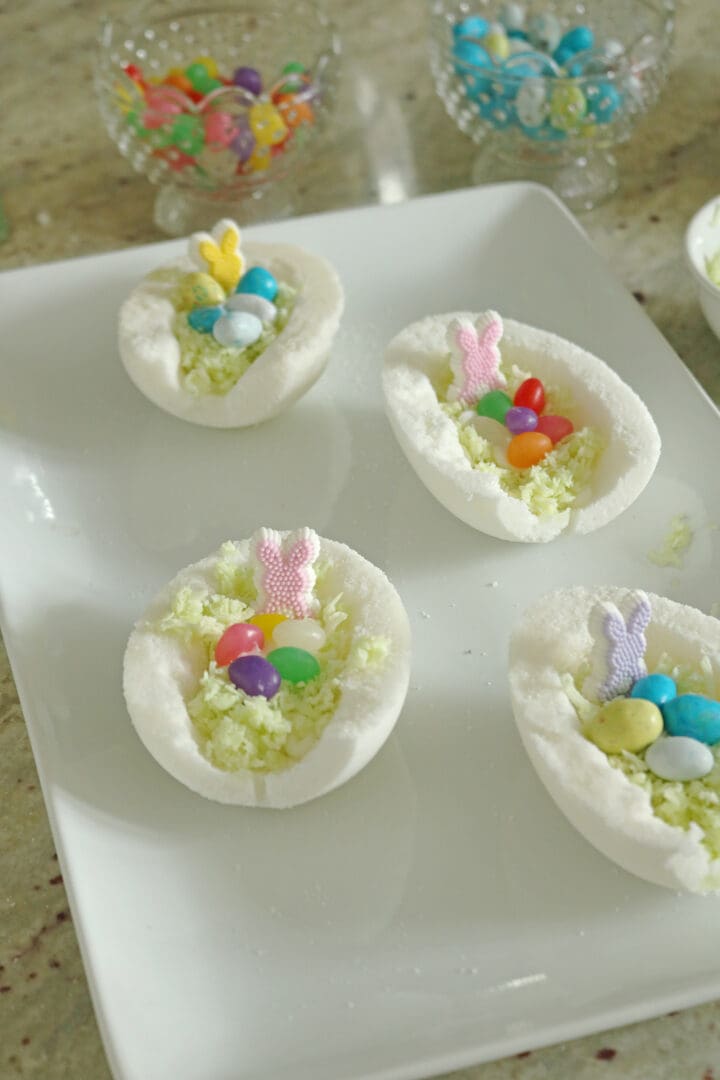
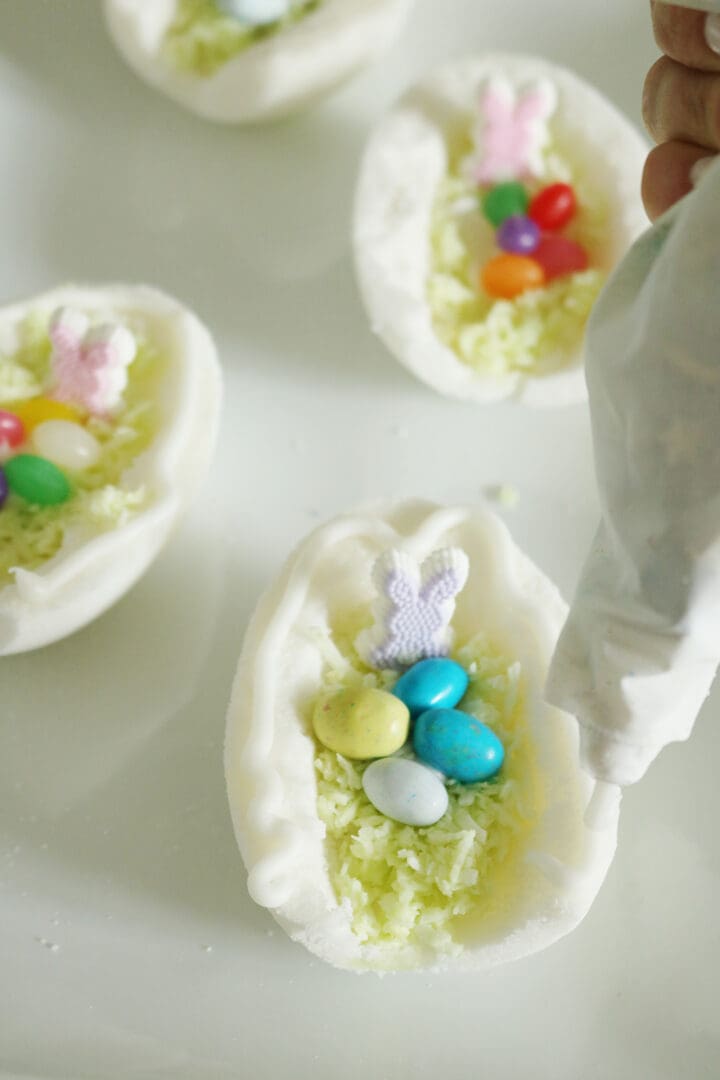
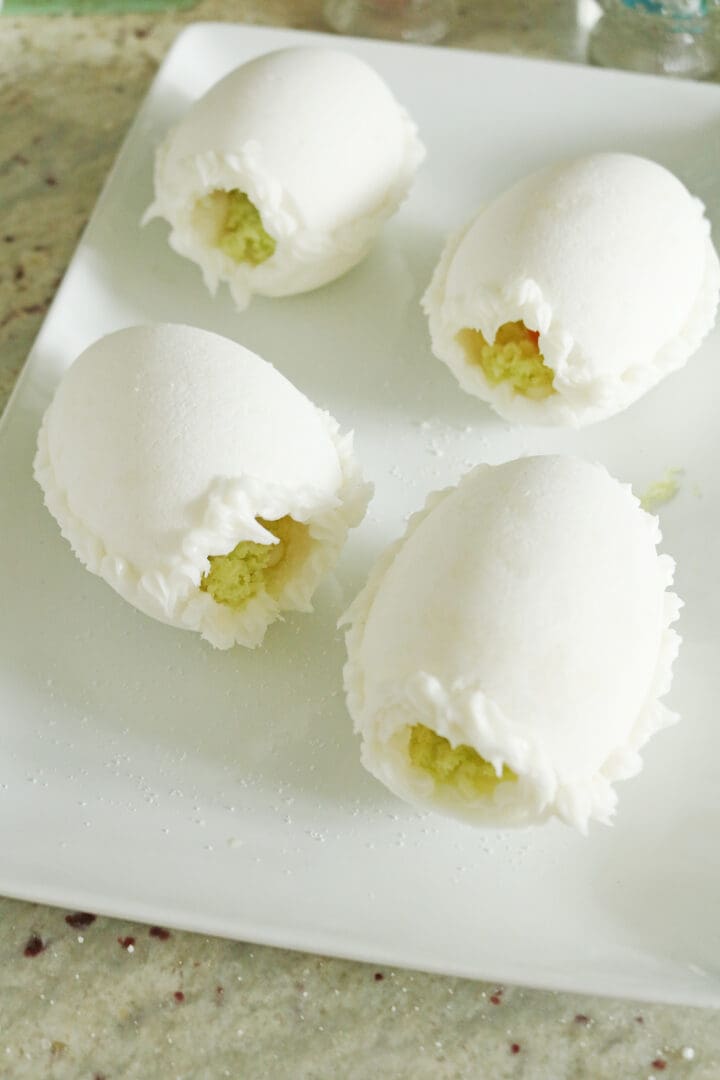
Now it’s time for the fun part– decorate the egg! Use all sorts of Easter candies and dyed shredded coconuts. Royal icing will be the glue. Feel free to add color to your royal icing. Once the inside is decorated, use royal icing to glue the top on of the egg shell. Then decorate the outside. Have fun with it! No need for perfection. Sugar panoramic Easter eggs are fun to place in Easter baskets or decorate around the house. This year, I am using them for name placement for our Easter table.


SHOP the Sugar Panoramic Easter eggs POST:
The post Sugar Panoramic Easter Eggs appeared first on Darling Darleen | A Lifestyle Design Blog.
